---
title: "Building a Newsletter System Without the Headache"
url: "https://sarthakmishra.com/blog/building-newsletter-with-astro-cloudflare-and-resend"
description: "How I added a complete newsletter system to my static Astro site using Cloudflare KV, Resend, and MDX - no external CMS required."
image: "https://sarthakmishra.com/og-images/blog/building-newsletter-with-astro-cloudflare-and-resend.webp"
---
[View HTML](https://sarthakmishra.com/blog/building-newsletter-with-astro-cloudflare-and-resend) · [Site index](https://sarthakmishra.com/llms.txt)
August 1, 2025
# Building a Newsletter System Without the Headache
How I added a complete newsletter system to my static Astro site using Cloudflare KV, Resend, and MDX - no external CMS required.

I’ve been putting off adding a newsletter to my site for months. Not because I didn’t want one, but because every solution I looked at felt a little overkill.
ConvertKit, Mailchimp, Beehiiv, Substack - they’re all great, but I didn’t want another dashboard to manage or monthly subscription to juggle.
My site was **happily static**, hosted on Cloudflare Pages, built with Astro. Simple, fast, cheap. Adding a newsletter meant giving up some of that simplicity, but I wanted to do it my way: no external CMS, just my familiar MDX workflow for writing content.
Here’s how I built a complete newsletter system using Cloudflare KV, Resend for email delivery, and kept everything manageable with simple MDX files.
## The Requirements
Before diving into code, I had a few non-negotiables:
- **No external CMS** - I wanted to write newsletters like blog posts, in MDX
- **Newsletter archive** - Each newsletter should be a full webpage for SEO
- **Email compliance** - Support Gmail’s bulk sender requirements
- **Simple management** - Automated scheduling, minimal manual work
- **Cost-effective** - Leverage existing Cloudflare infrastructure
## The Architecture Decisions
### From Static to Server-Side
The biggest change was moving from a static site to server-side rendering. Astro v5 no longer supports hybrid mode, but I think that’s actually a better choice - it forces you to think about the requirements of every route separately and set the pre-rendering directive explicitly for each page. No magic, just simple, straightforward config:
```js
// astro.config.mjs
export default defineConfig({
output: 'server', // Instead of hybrid
adapter: cloudflare({
platformProxy: {
enabled: true,
configPath: './wrangler.jsonc',
},
}),
});
```
For pages that should remain static, I just added `export const prerender = true` at the top.
### Cloudflare KV vs Resend Broadcast
Resend has a broadcast API that seemed perfect initially, but the limitations were a deal breaker for me. While broadcasts automatically include the required unsubscribe headers, they only support basic template variables (`{{{FIRST_NAME}}}`, `{{{LAST_NAME}}}`, `{{{EMAIL}}}`) and force you to use their managed unsubscribe system.
Cloudflare KV gave me the flexibility I needed:
- Store subscriber data with custom tokens
- Generate secure unsubscribe URLs per recipient
- Use unlimited custom variables in email templates
The data structure is straightforward, but I can expand it later as needed:
```text
contact:{email} → Subscriber data, status, tokens
token:{confirmationToken} → Maps tokens to emails (24h TTL)
unsubscribe:{unsubscribeToken} → Maps unsubscribe tokens to emails
newsletter:sent:{issueNumber} → Track sent newsletters
```
#### The Three-State Subscriber Lifecycle
What makes this system robust is how it handles the complete subscriber lifecycle. Each contact moves through distinct states:
```typescript
interface ContactData {
email: string;
firstName?: string;
lastName?: string;
status: 'pending' | 'subscribed' | 'unsubscribed';
confirmationToken: string;
createdAt: string;
confirmedAt?: string;
unsubscribeToken?: string;
unsubscribedAt?: string;
}
```
**Pending State:** When someone subscribes, they start here. The system generates a cryptographically secure confirmation token and stores it with a 24-hour TTL. If they don’t confirm within that window, the token expires and they’ll need to re-subscribe.
**Subscribed State:** After clicking the confirmation link, the system generates an unsubscribe token, stores it permanently in KV, and sends a welcome email. This unsubscribe token is what powers the one-click unsubscribe functionality Gmail requires.
**Unsubscribed State:** The final state. Importantly, I don’t delete subscriber data - I just mark them as unsubscribed. This prevents accidental re-subscriptions and maintains a complete audit trail.
#### Security Through Cryptographic Tokens
Instead of using predictable URLs or simple hashes, every token is generated using the Web Crypto API:
```javascript
// Generate 32-byte cryptographically secure token
const tokenArray = new Uint8Array(32);
globalThis.crypto.getRandomValues(tokenArray);
const confirmationToken = Array.from(tokenArray, byte =>
byte.toString(16).padStart(2, '0')
).join('');
```
This means confirmation and unsubscribe URLs are impossible to guess or brute force. Each token is effectively a 256-bit secret that only the recipient knows.
#### Smart Error Handling & Dual Interface Support
One thing I’m particularly proud of is how the API endpoints handle both redirect-based flows (traditional email clicks) and JSON responses (for dynamic UI updates). The system detects whether a request is internal by checking headers:
```javascript
const isInternalCall =
request.headers.get('origin')?.includes(site?.origin || '') ||
request.headers.get('referer')?.includes('/newsletter/result');
```
If it’s an internal call from my result page, it returns JSON. If it’s a direct email click, it redirects to the appropriate result page. This lets me build a seamless single-page experience while maintaining email compatibility.
#### Gmail One-Click Unsubscribe Compliance
The unsubscribe endpoint handles three different flows depending on how users arrive:
```javascript
// GET requests (email link clicks) - immediate unsubscription
if (request.method === 'GET') {
// Directly update contact status to 'unsubscribed'
const updatedContact = {
...contact,
status: 'unsubscribed',
unsubscribedAt: new Date().toISOString(),
};
await kv.put(`contact:${email}`, JSON.stringify(updatedContact));
}
// POST with Gmail one-click format - immediate unsubscription
if (contentType.includes('application/x-www-form-urlencoded')) {
const formData = await request.formData();
if (formData.get('List-Unsubscribe') === 'One-Click') {
// Direct unsubscribe, return empty 200 response for Gmail
return new Response('', { status: 200 });
}
}
// POST with JSON (website forms) - sends confirmation email first
if (contact.unsubscribeToken) {
await sendUnsubscribeConfirmationEmail(/* ... */);
return new Response(
JSON.stringify({
message: 'Please check your email to confirm unsubscription.',
})
);
}
```
When users click unsubscribe links in emails, they’re immediately unsubscribed. Only form submissions from the website trigger confirmation emails. Gmail’s automated system gets the immediate response it requires.
### Email Templates with React Email
I used `react-email` for maintainable, responsive templates, but building email templates in 2025 still feels like optimizing a web page for Internet Explorer.
#### From Design to Code: The Workflow
I started by designing the newsletters in Figma, then exported the HTML using this [plugin](https://markaplugin.com/), and converted it to a react-email template with Cursor & Claude.
This design-first approach proved surprisingly effective (especially while vibe-coding with Cursor) having a clear visual reference made the template conversion process much more straightforward.
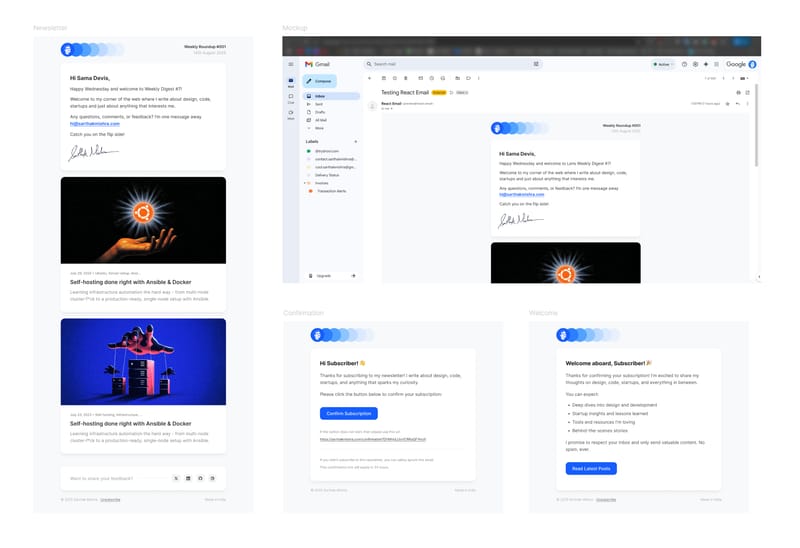
Initial newsletter design in Figma - clean, modern layout with proper spacing
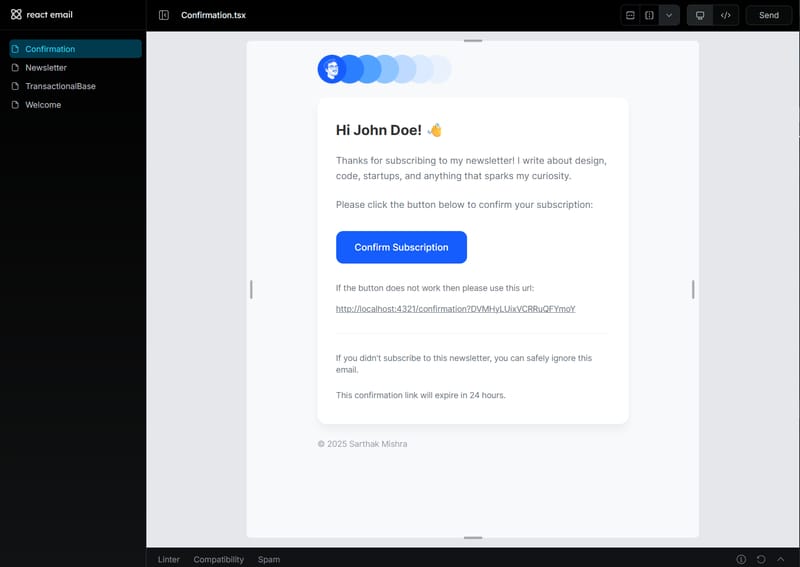
React Email's preview interface - invaluable for testing email rendering across clients
#### The Email Styling Gotchas
Modern web development spoils you. Flexbox, CSS Grid, SVGs, modern fonts - none of that works reliably in emails.
**Tables for layout:** Every major structural element uses tables for positioning. Even in 2025, this is the only way to ensure consistent rendering across email clients.
```tsx
{newsletterTitle} #{newsletterNumber}
```
**SVGs to PNGs:** Every icon, logo, and graphic had to be converted to PNG and hosted statically. I put everything in Astro’s `public/emails/` folder so they can be referenced with absolute URLs.
**Tailwind limitations:** While react-email supports Tailwind, many utilities don’t work in email contexts. I ended up writing custom CSS for mobile responsiveness:
```css
@media (max-width: 520px) {
.main-container {
padding-left: 24px !important;
padding-right: 24px !important;
}
.button {
width: 100% !important;
text-align: center !important;
}
}
```
Here are the three final templates I ended up with:
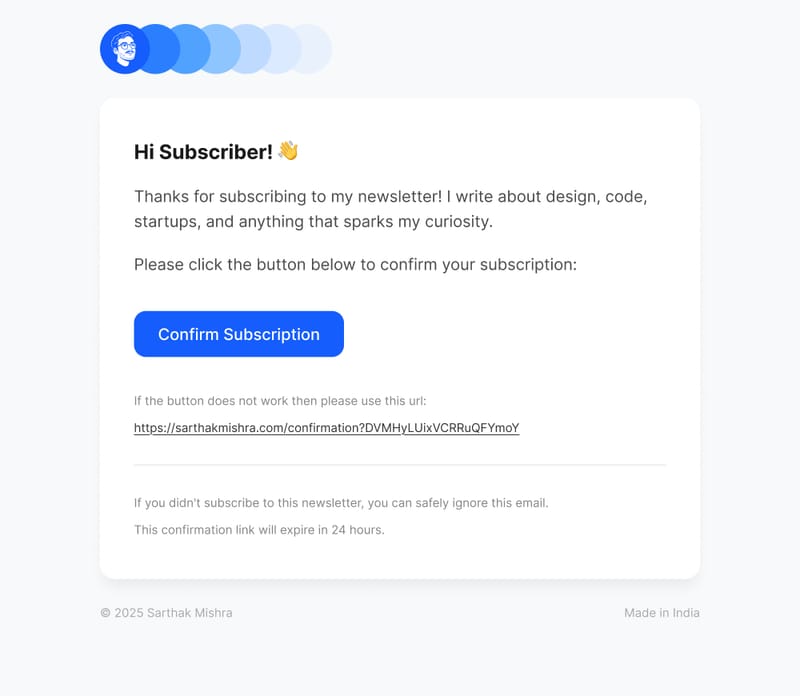
Confirmation email - simple, focused design with one clear action
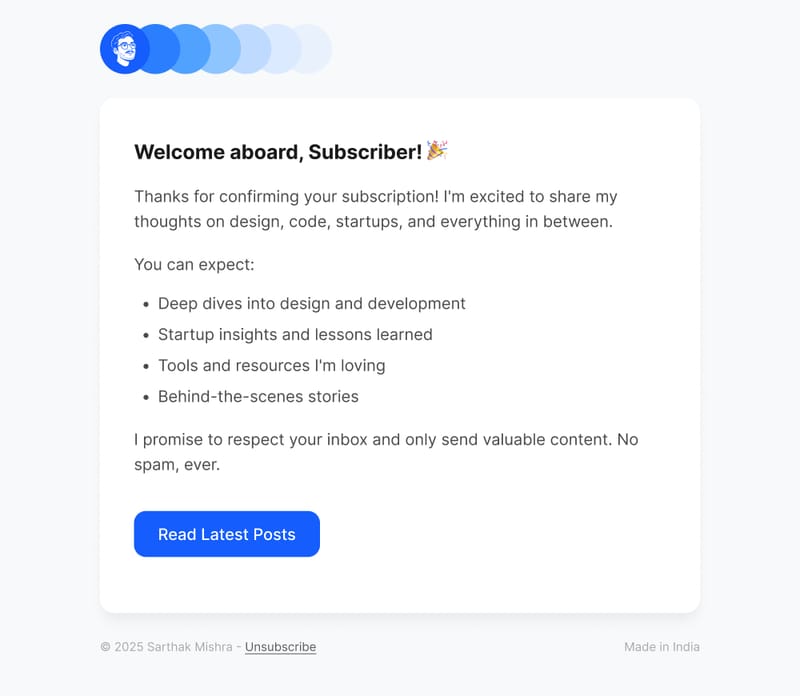
Welcome email - sets expectations and provides value immediately after confirmation
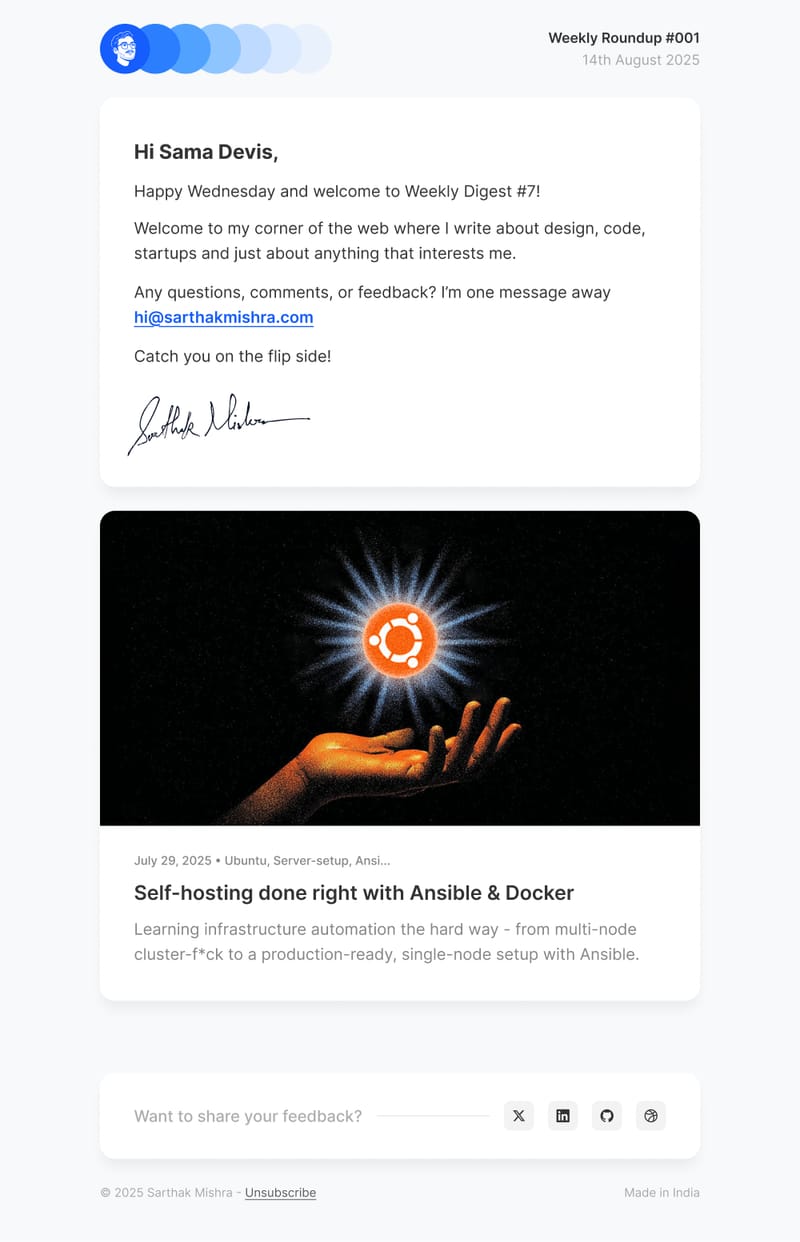
The final newsletter template - in Figma
#### Markdown in Emails
I thought this would be the most complex part, but react-email has wonderful support for markdown - it’s plug and play. React Email’s `` component lets you define custom styles for every element:
```tsx
{message}
```
This gives me the flexibility to write newsletter content in familiar markdown while ensuring it renders beautifully across email clients. Headers, lists, code blocks, blockquotes - everything just works.
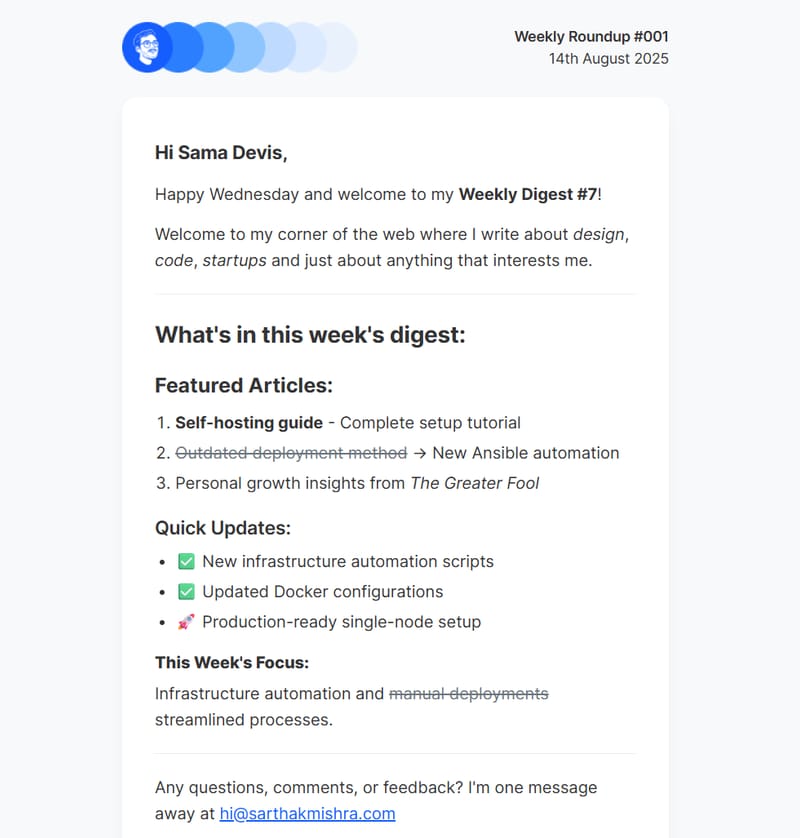
Markdown preview - rich markdown content, blog post previews, and social links, all mobile-responsive
## The Subscription Flow
### API Routes
Three main endpoints handle the entire flow:
1. **`/api/subscribe`** - New subscriptions with validation and double opt-in
2. **`/api/confirm`** - Email confirmation processing
3. **`/api/unsubscribe`** - Unsubscription with Gmail one-click support
The subscribe endpoint generates cryptographically secure tokens and stores everything in KV:
```js
// Generate secure confirmation token
const tokenArray = new Uint8Array(32);
globalThis.crypto.getRandomValues(tokenArray);
const confirmationToken = Array.from(tokenArray, byte =>
byte.toString(16).padStart(2, '0')
).join('');
// Store with 24-hour expiry
await kv.put(`token:${confirmationToken}`, email, {
expirationTtl: 86400,
});
```
### Smart Result Page
Instead of multiple pages for different states, I built one dynamic result page that handles all newsletter status messages. It reads URL parameters and updates content client-side:
```js
const messages = {
confirmed: {
title: 'Subscription Confirmed! 🎉',
isSuccess: true,
},
'token-expired': {
title: 'Link Expired ⏰',
isSuccess: false,
},
// ... other states
};
```
The page shows appropriate actions based on the message type - “Check Gmail” for pending confirmations, “Read Latest Posts” for successful actions.
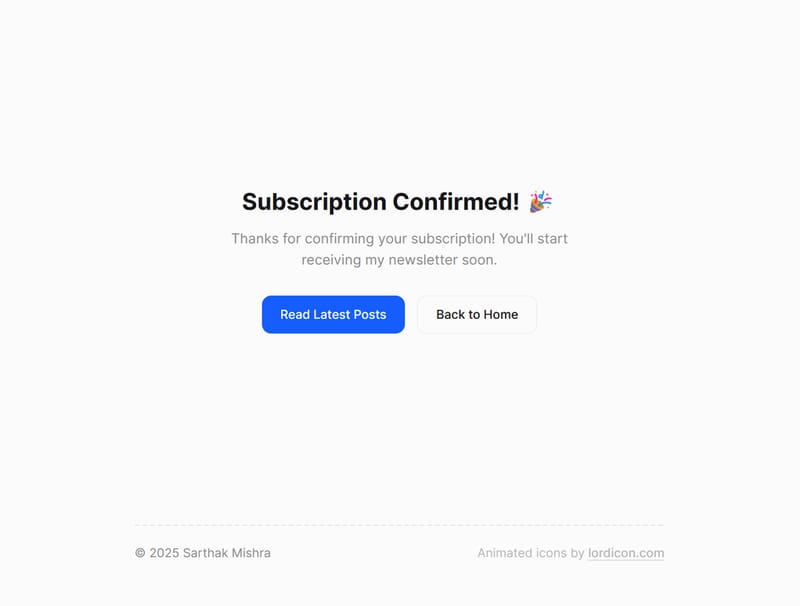
Result page - subscription confirmed
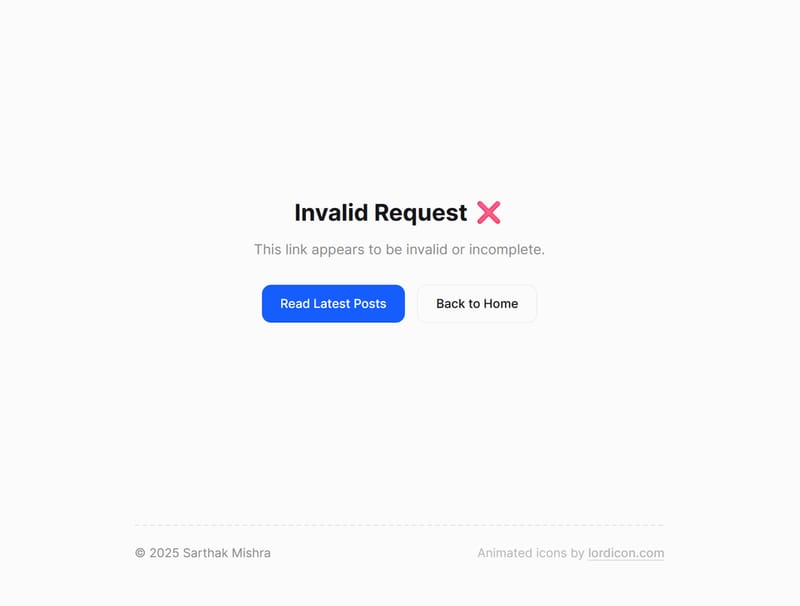
Result page - invalid request
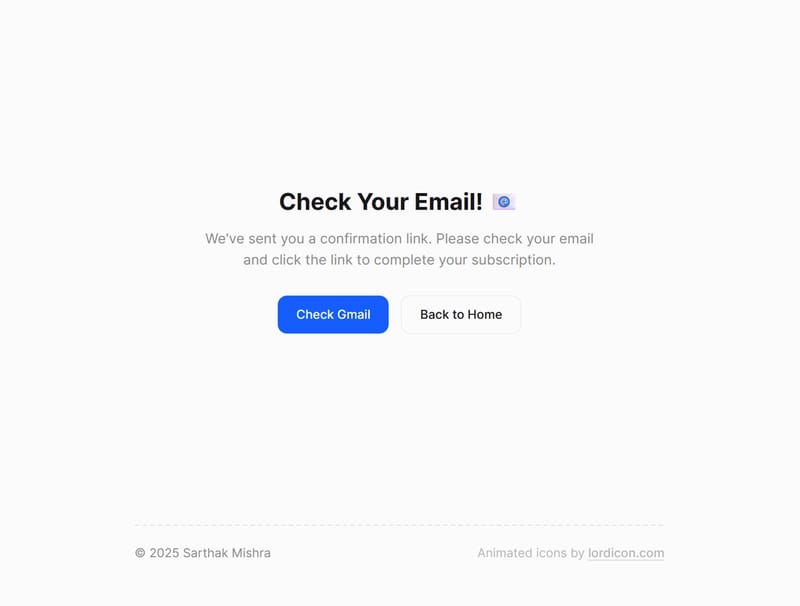
Result page - check email
## MDX-Based Newsletter Management
The real magic happens in the content system. Each newsletter is a simple MDX file with frontmatter:
```mdx
---
title: 'Weekly Roundup'
issueNumber: 7
date: '2025-01-14'
recipientName: 'friend'
draft: false
blogPosts:
- title: 'Self-hosting done right'
url: '/blog/self-hosting-ansible-docker'
image: '/posts/self-hosting.png'
---
Happy Tuesday! This week I've been deep in infrastructure automation...
```
Astro’s content collections handle the schema validation and static page generation. Each newsletter becomes a proper webpage at `/newsletter/issue-1` for SEO.
## Automated Scheduling
The scheduling script was the final piece - a comprehensive automation system that runs locally as part of deployment. It connects to Cloudflare KV via REST API, scans for new newsletter issues, and orchestrates the entire scheduling process.
### The Script Architecture
The scheduler is built around several key components:
**1. Local KV Integration:** Instead of requiring server deployment to access KV, I built a REST API client that connects directly to Cloudflare’s KV API from my local environment:
```typescript
class LocalKVStore implements KVNamespace {
private baseUrl: string;
constructor(accountId: string, namespaceId: string, apiToken: string) {
this.baseUrl = `https://api.cloudflare.com/client/v4/accounts/${accountId}/storage/kv/namespaces/${namespaceId}`;
}
async get(key: string): Promise {
const response = await fetch(`${this.baseUrl}/values/${key}`, {
headers: { Authorization: `Bearer ${this.apiToken}` },
});
return response.status === 404 ? null : await response.text();
}
}
```
**2. MDX File Parsing:** The script scans `src/data/newsletter/` for MDX files, parses frontmatter, and finds the latest non-draft issue:
```typescript
function getLatestNewsletterIssue(): ParsedNewsletter | null {
const files = fs
.readdirSync(newsletterDir)
.filter(file => file.endsWith('.mdx') && file.startsWith('issue-'))
.sort();
// Skip drafts and find highest issue number
for (const file of files) {
const { frontmatter } = parseFrontmatter(content);
if (frontmatter.draft === true) continue;
// Return latest by issue number
}
}
```
**3. Smart Scheduling Logic:** Calculates the next Thursday at 10am PDT, accounting for timezone conversion and edge cases. Note that this implementation is simplified for this article; a more robust solution would use a library like `date-fns-tz` to handle daylight saving changes automatically.
```typescript
function getNextThursdayPDT(): Date {
const nowPDT = new Date(
new Date().toLocaleString('en-US', {
timeZone: 'America/Los_Angeles',
})
);
const currentDay = nowPDT.getDay();
const currentHour = nowPDT.getHours();
let daysUntilThursday: number;
if (currentDay < 4) {
daysUntilThursday = 4 - currentDay;
} else if (currentDay === 4 && currentHour < 10) {
daysUntilThursday = 0; // Today, but before 10am
} else {
daysUntilThursday = 7 - currentDay + 4; // Next week
}
// Convert back to UTC for Resend
return new Date(nextThursday.getTime() + 7 * 60 * 60 * 1000);
}
```
### Individual Email Scheduling
One of Resend’s limitations is that batch emails cannot be scheduled - only individual emails can use the `scheduledAt` parameter. The script handles this by creating individual scheduling requests:
```typescript
const emailPromises = subscribers.map(async email => {
const unsubscribeUrl = await getUnsubscribeUrl(email, kv, baseUrl);
return await resend.emails.send({
from: 'Sarthak Mishra ',
to: [email],
subject: `${newsletter.title} #${newsletter.issueNumber.toString().padStart(3, '0')}`,
scheduledAt: scheduledDate.toISOString(),
headers: {
'List-Unsubscribe': `<${unsubscribeUrl}>`,
'List-Unsubscribe-Post': 'List-Unsubscribe=One-Click',
'X-Entity-Ref-ID': `newsletter-${newsletter.issueNumber}-${Date.now()}`,
},
react: Newsletter({
/* ... */
}),
});
});
await Promise.all(emailPromises);
```
### Duplicate Prevention & Status Tracking
The script maintains comprehensive state in KV to prevent duplicate sends:
```typescript
// Check status before scheduling
const status = await checkNewsletterStatus(issueNumber, kv);
if (status.sent || status.scheduled) {
console.log('Newsletter already processed');
return;
}
// Mark as scheduled after successful scheduling
await kv.put(
`newsletter:scheduled:${issueNumber}`,
JSON.stringify({
scheduledAt: new Date().toISOString(),
scheduledFor: scheduledDate.toISOString(),
})
);
```
### Deployment Integration
The script runs as part of my deployment pipeline. After pushing a new newsletter MDX file, the deployment process automatically:
1. Builds the site with the new newsletter archive page
2. Runs the scheduling script to check for new issues
3. Schedules emails if a new non-draft issue is found
4. Deploys everything to Cloudflare Pages
This means I can write a newsletter in MDX, commit it, and the entire scheduling happens automatically. The script validates everything: Resend’s 30-day scheduling limit, subscriber status, duplicate prevention, and proper unsubscribe token generation.
## The Result
I now have a newsletter system that:
- Costs $0 (Cloudflare Workers & KV + Resend - Free tiers)
- Handles subscription, confirmation, and unsubscribe flows automatically
- Creates SEO-friendly archive pages for each issue
- Schedules newsletters automatically on deployment
Writing a newsletter feels exactly like writing a blog post. I can focus on content instead of fighting with tools.
P.S. This is my first [newsletter](https://sarthakmishra.com/newsletter/issue-1).
## Structured data
```json
{
"@context": "https://schema.org",
"@graph": [
{
"@type": "WebSite",
"@id": "https://sarthakmishra.com/#website",
"url": "https://sarthakmishra.com/",
"name": "Sarthak Mishra",
"publisher": {
"@id": "https://sarthakmishra.com/#person"
},
"inLanguage": "en"
},
{
"@type": "Person",
"@id": "https://sarthakmishra.com/#person",
"name": "Sarthak Mishra",
"url": "https://sarthakmishra.com/about",
"jobTitle": "Design Engineer",
"image": "https://sarthakmishra.com/og-images/sarthak-mishra.webp",
"sameAs": [
"https://github.com/SarthakMishra",
"https://www.linkedin.com/in/itssarthakmishra/",
"https://x.com/MishraMishry"
]
},
{
"@type": "WebPage",
"@id": "https://sarthakmishra.com/blog/building-newsletter-with-astro-cloudflare-and-resend#webpage",
"url": "https://sarthakmishra.com/blog/building-newsletter-with-astro-cloudflare-and-resend",
"name": "Building a Newsletter System Without the Headache",
"description": "How I added a complete newsletter system to my static Astro site using Cloudflare KV, Resend, and MDX - no external CMS required.",
"inLanguage": "en",
"isPartOf": {
"@id": "https://sarthakmishra.com/#website"
},
"mainEntity": {
"@id": "https://sarthakmishra.com/blog/building-newsletter-with-astro-cloudflare-and-resend#content"
},
"breadcrumb": {
"@id": "https://sarthakmishra.com/blog/building-newsletter-with-astro-cloudflare-and-resend#breadcrumb"
}
},
{
"@id": "https://sarthakmishra.com/blog/building-newsletter-with-astro-cloudflare-and-resend#content",
"url": "https://sarthakmishra.com/blog/building-newsletter-with-astro-cloudflare-and-resend",
"name": "Building a Newsletter System Without the Headache",
"description": "How I added a complete newsletter system to my static Astro site using Cloudflare KV, Resend, and MDX - no external CMS required.",
"mainEntityOfPage": {
"@id": "https://sarthakmishra.com/blog/building-newsletter-with-astro-cloudflare-and-resend#webpage"
},
"author": {
"@id": "https://sarthakmishra.com/#person"
},
"datePublished": "2025-08-01T00:00:00.000Z",
"inLanguage": "en",
"keywords": [
"newsletter",
"astro",
"cloudflare",
"resend",
"mdx",
"email",
"static-site",
"automation"
],
"@type": "BlogPosting",
"headline": "Building a Newsletter System Without the Headache",
"publisher": {
"@id": "https://sarthakmishra.com/#person"
},
"image": "https://sarthakmishra.com/og-images/blog/building-newsletter-with-astro-cloudflare-and-resend.webp"
},
{
"@type": "BreadcrumbList",
"@id": "https://sarthakmishra.com/blog/building-newsletter-with-astro-cloudflare-and-resend#breadcrumb",
"itemListElement": [
{
"@type": "ListItem",
"position": 1,
"name": "Home",
"item": "https://sarthakmishra.com/"
},
{
"@type": "ListItem",
"position": 2,
"name": "Blog",
"item": "https://sarthakmishra.com/blog"
},
{
"@type": "ListItem",
"position": 3,
"name": "Building a Newsletter System Without the Headache",
"item": "https://sarthakmishra.com/blog/building-newsletter-with-astro-cloudflare-and-resend"
}
]
}
]
}
```
