Building a Newsletter System Without the Headache
How I added a complete newsletter system to my static Astro site using Cloudflare KV, Resend, and MDX - no external CMS required.

I’ve been putting off adding a newsletter to my site for months. Not because I didn’t want one, but because every solution I looked at felt a little overkill.
ConvertKit, Mailchimp, Beehiiv, Substack - they’re all great, but I didn’t want another dashboard to manage or monthly subscription to juggle.
My site was happily static, hosted on Cloudflare Pages, built with Astro. Simple, fast, cheap. Adding a newsletter meant giving up some of that simplicity, but I wanted to do it my way: no external CMS, just my familiar MDX workflow for writing content.
Here’s how I built a complete newsletter system using Cloudflare KV, Resend for email delivery, and kept everything manageable with simple MDX files.
The Requirements
Before diving into code, I had a few non-negotiables:
- No external CMS - I wanted to write newsletters like blog posts, in MDX
- Newsletter archive - Each newsletter should be a full webpage for SEO
- Email compliance - Support Gmail’s bulk sender requirements
- Simple management - Automated scheduling, minimal manual work
- Cost-effective - Leverage existing Cloudflare infrastructure
The Architecture Decisions
From Static to Server-Side
The biggest change was moving from a static site to server-side rendering. Astro v5 no longer supports hybrid mode, but I think that’s actually a better choice - it forces you to think about the requirements of every route separately and set the pre-rendering directive explicitly for each page. No magic, just simple, straightforward config:
// astro.config.mjs
export default defineConfig({
  output: 'server', // Instead of hybrid
  adapter: cloudflare({
    platformProxy: {
      enabled: true,
      configPath: './wrangler.jsonc',
    },
  }),
});
For pages that should remain static, I just added export const prerender = true at the top.
Cloudflare KV vs Resend Broadcast
Resend has a broadcast API that seemed perfect initially, but the limitations were a deal breaker for me. While broadcasts automatically include the required unsubscribe headers, they only support basic template variables ({{{FIRST_NAME}}}, {{{LAST_NAME}}}, {{{EMAIL}}}) and force you to use their managed unsubscribe system.
Cloudflare KV gave me the flexibility I needed:
- Store subscriber data with custom tokens
- Generate secure unsubscribe URLs per recipient
- Use unlimited custom variables in email templates
The data structure is straightforward, but I can expand it later as needed:
contact:{email}              → Subscriber data, status, tokens
token:{confirmationToken}    → Maps tokens to emails (24h TTL)
unsubscribe:{unsubscribeToken} → Maps unsubscribe tokens to emails
newsletter:sent:{issueNumber}  → Track sent newsletters
The Three-State Subscriber Lifecycle
What makes this system robust is how it handles the complete subscriber lifecycle. Each contact moves through distinct states:
interface ContactData {
  email: string;
  firstName?: string;
  lastName?: string;
  status: 'pending' | 'subscribed' | 'unsubscribed';
  confirmationToken: string;
  createdAt: string;
  confirmedAt?: string;
  unsubscribeToken?: string;
  unsubscribedAt?: string;
}
Pending State: When someone subscribes, they start here. The system generates a cryptographically secure confirmation token and stores it with a 24-hour TTL. If they don’t confirm within that window, the token expires and they’ll need to re-subscribe.
Subscribed State: After clicking the confirmation link, the system generates an unsubscribe token, stores it permanently in KV, and sends a welcome email. This unsubscribe token is what powers the one-click unsubscribe functionality Gmail requires.
Unsubscribed State: The final state. Importantly, I don’t delete subscriber data - I just mark them as unsubscribed. This prevents accidental re-subscriptions and maintains a complete audit trail.
Security Through Cryptographic Tokens
Instead of using predictable URLs or simple hashes, every token is generated using the Web Crypto API:
// Generate 32-byte cryptographically secure token
const tokenArray = new Uint8Array(32);
globalThis.crypto.getRandomValues(tokenArray);
const confirmationToken = Array.from(tokenArray, byte =>
  byte.toString(16).padStart(2, '0')
).join('');
This means confirmation and unsubscribe URLs are impossible to guess or brute force. Each token is effectively a 256-bit secret that only the recipient knows.
Smart Error Handling & Dual Interface Support
One thing I’m particularly proud of is how the API endpoints handle both redirect-based flows (traditional email clicks) and JSON responses (for dynamic UI updates). The system detects whether a request is internal by checking headers:
const isInternalCall =
  request.headers.get('origin')?.includes(site?.origin || '') ||
  request.headers.get('referer')?.includes('/newsletter/result');
If it’s an internal call from my result page, it returns JSON. If it’s a direct email click, it redirects to the appropriate result page. This lets me build a seamless single-page experience while maintaining email compatibility.
Gmail One-Click Unsubscribe Compliance
The unsubscribe endpoint handles three different flows depending on how users arrive:
// GET requests (email link clicks) - immediate unsubscription
if (request.method === 'GET') {
  // Directly update contact status to 'unsubscribed'
  const updatedContact = {
    ...contact,
    status: 'unsubscribed',
    unsubscribedAt: new Date().toISOString(),
  };
  await kv.put(`contact:${email}`, JSON.stringify(updatedContact));
}

// POST with Gmail one-click format - immediate unsubscription
if (contentType.includes('application/x-www-form-urlencoded')) {
  const formData = await request.formData();
  if (formData.get('List-Unsubscribe') === 'One-Click') {
    // Direct unsubscribe, return empty 200 response for Gmail
    return new Response('', { status: 200 });
  }
}

// POST with JSON (website forms) - sends confirmation email first
if (contact.unsubscribeToken) {
  await sendUnsubscribeConfirmationEmail(/* ... */);
  return new Response(
    JSON.stringify({
      message: 'Please check your email to confirm unsubscription.',
    })
  );
}
When users click unsubscribe links in emails, they’re immediately unsubscribed. Only form submissions from the website trigger confirmation emails. Gmail’s automated system gets the immediate response it requires.
Email Templates with React Email
I used react-email for maintainable, responsive templates, but building email templates in 2025 still feels like optimizing a web page for Internet Explorer.
From Design to Code: The Workflow
I started by designing the newsletters in Figma, then exported the HTML using this plugin, and converted it to a react-email template with Cursor & Claude.
This design-first approach proved surprisingly effective (especially while vibe-coding with Cursor) having a clear visual reference made the template conversion process much more straightforward.
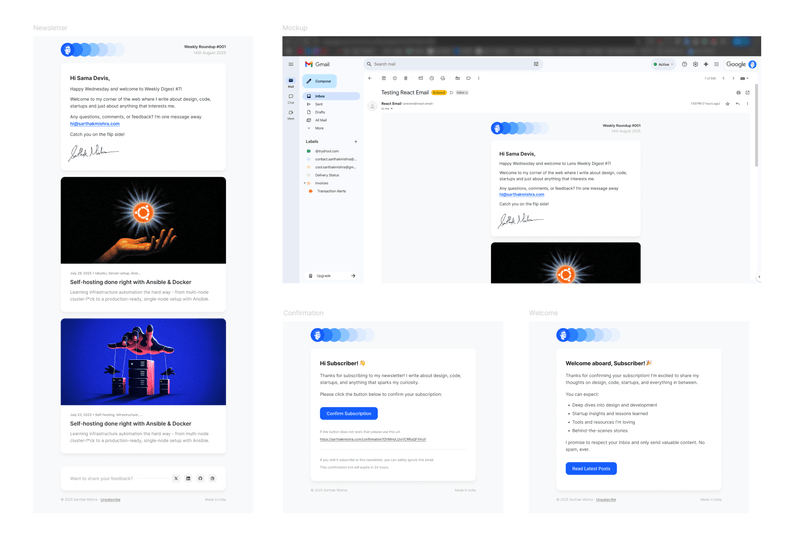
Initial newsletter design in Figma - clean, modern layout with proper spacing
React Email's preview interface - invaluable for testing email rendering across clients
The Email Styling Gotchas
Modern web development spoils you. Flexbox, CSS Grid, SVGs, modern fonts - none of that works reliably in emails.
Tables for layout: Every major structural element uses tables for positioning. Even in 2025, this is the only way to ensure consistent rendering across email clients.
<table
  className="header-table"
  width="100%"
  cellPadding="0"
  cellSpacing="0"
  style={{ borderCollapse: 'collapse' }}
>
  <tr>
    <td style={{ verticalAlign: 'middle', textAlign: 'left' }}>
      <Img src={`${baseUrl}/emails/header-logo.png`} />
    </td>
    <td style={{ verticalAlign: 'middle', textAlign: 'right' }}>
      <Text>
        {newsletterTitle} #{newsletterNumber}
      </Text>
    </td>
  </tr>
</table>
SVGs to PNGs: Every icon, logo, and graphic had to be converted to PNG and hosted statically. I put everything in Astro’s public/emails/ folder so they can be referenced with absolute URLs.
Tailwind limitations: While react-email supports Tailwind, many utilities don’t work in email contexts. I ended up writing custom CSS for mobile responsiveness:
@media (max-width: 520px) {
.main-container {
padding-left: 24px !important;
padding-right: 24px !important;
}
.button {
width: 100% !important;
text-align: center !important;
}
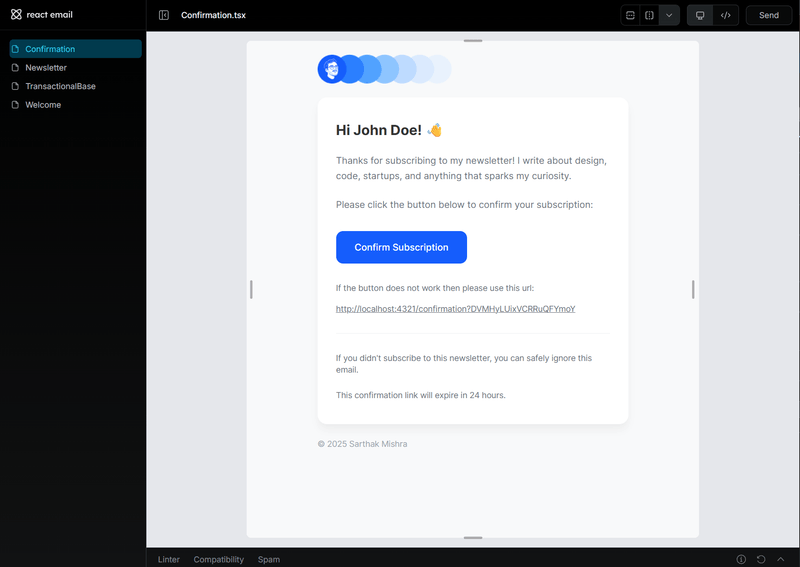
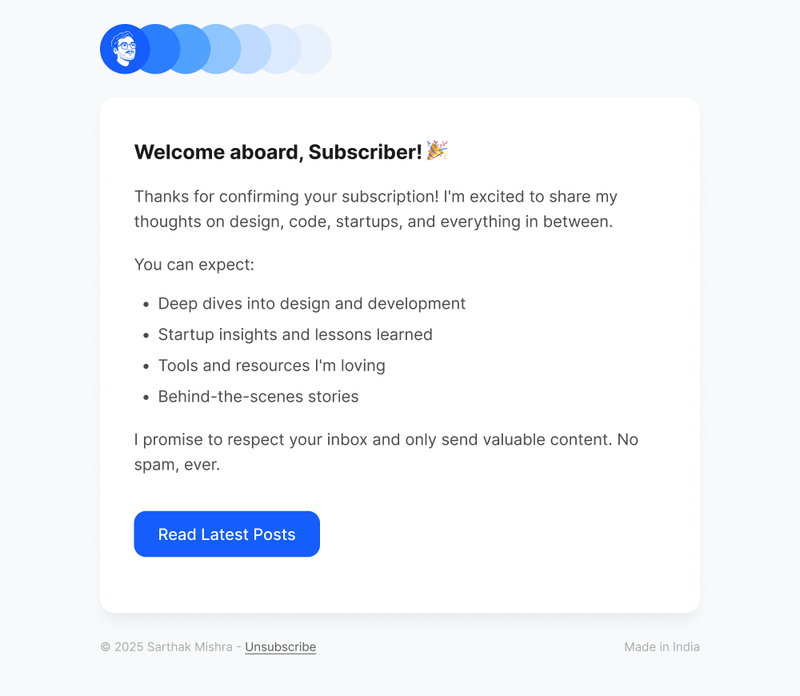
}Here are the three final templates I ended up with:
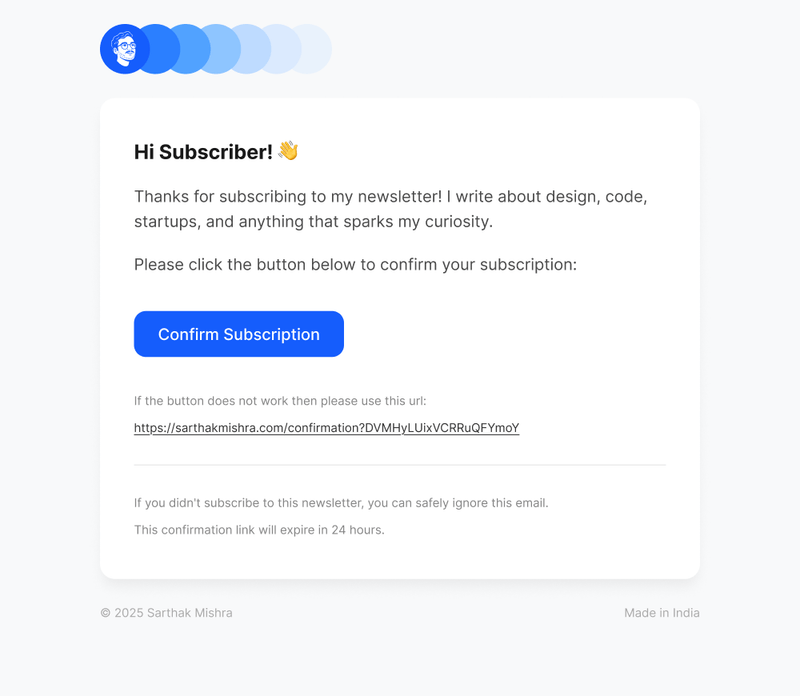
Confirmation email - simple, focused design with one clear action
Welcome email - sets expectations and provides value immediately after confirmation
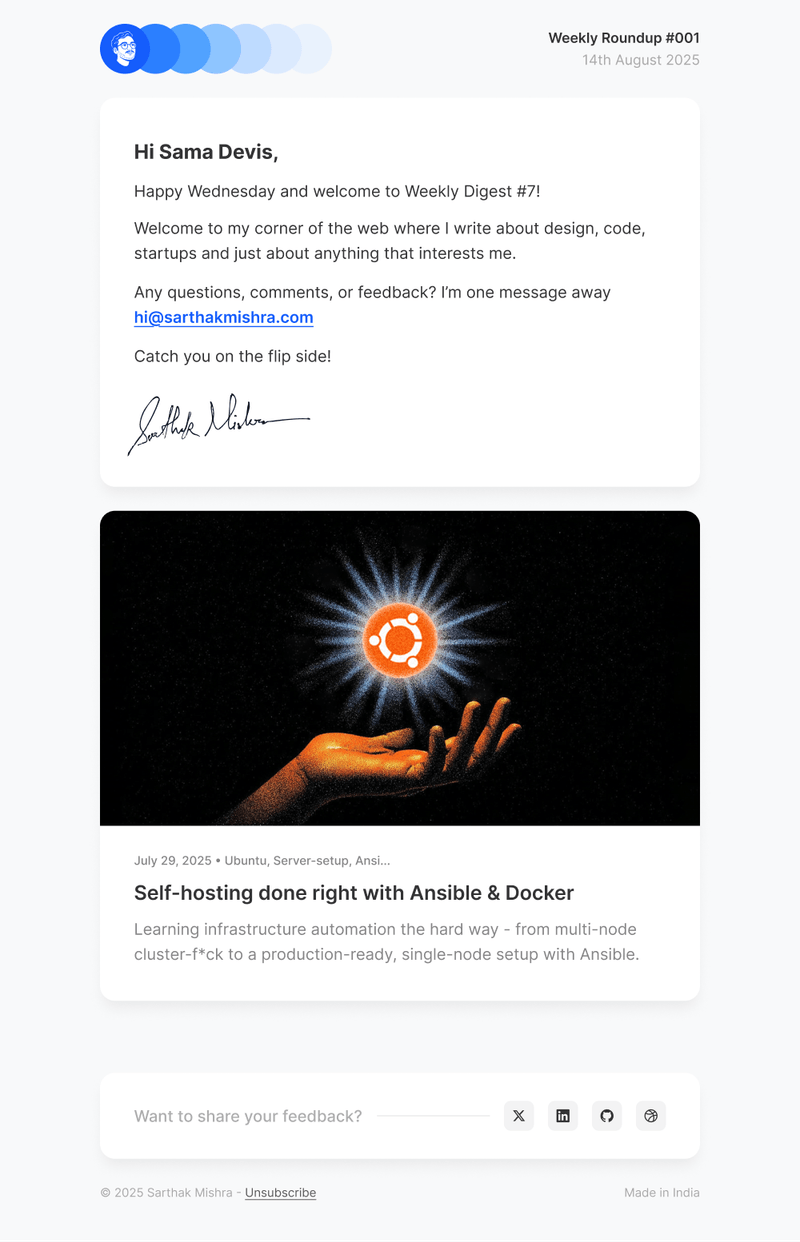
The final newsletter template - in Figma
Markdown in Emails
I thought this would be the most complex part, but react-email has wonderful support for markdown - it’s plug and play. React Email’s <Markdown> component lets you define custom styles for every element:
<Markdown
  markdownCustomStyles={{
    p: {
      margin: '0 0 14px 0',
      fontSize: '16px',
      lineHeight: '1.6em',
      color: '#333334',
    },
    blockQuote: {
      borderLeft: '4px solid #155dfc',
      paddingLeft: '16px',
      margin: '18px 0',
      fontStyle: 'italic',
      backgroundColor: '#f8f9fa',
    },
    codeInline: {
      backgroundColor: '#f1f3f4',
      padding: '2px 6px',
      borderRadius: '4px',
      fontFamily: 'Monaco, Consolas, "Courier New", monospace',
      color: '#d63384',
    },
    // ... 20+ more custom styles
  }}
>
  {message}
</Markdown>
This gives me the flexibility to write newsletter content in familiar markdown while ensuring it renders beautifully across email clients. Headers, lists, code blocks, blockquotes - everything just works.
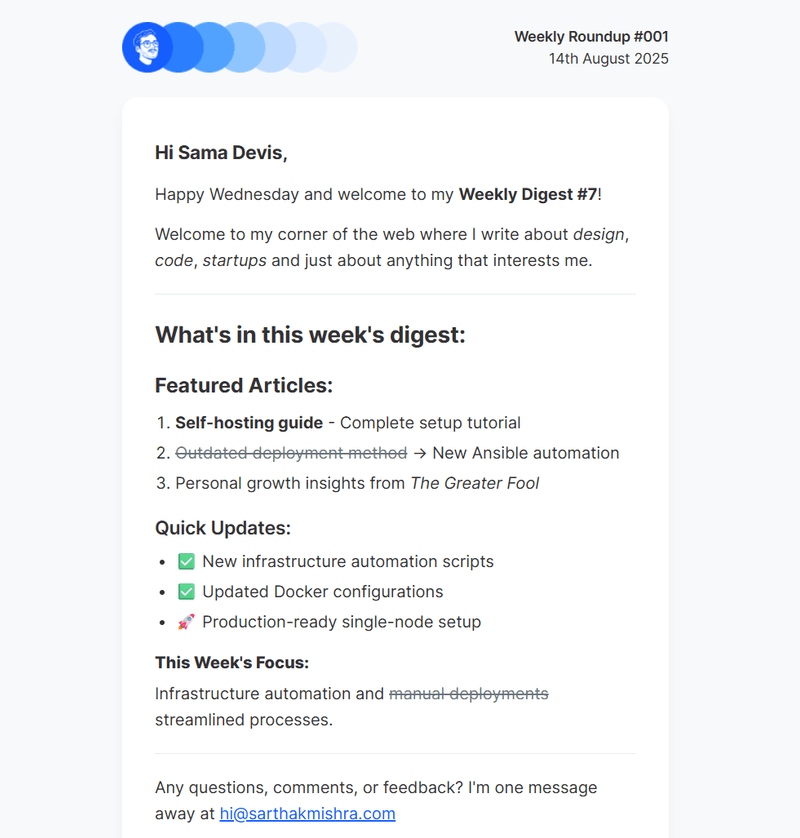
Markdown preview - rich markdown content, blog post previews, and social links, all mobile-responsive
The Subscription Flow
API Routes
Three main endpoints handle the entire flow:
/api/subscribe- New subscriptions with validation and double opt-in/api/confirm- Email confirmation processing/api/unsubscribe- Unsubscription with Gmail one-click support
The subscribe endpoint generates cryptographically secure tokens and stores everything in KV:
// Generate secure confirmation token
const tokenArray = new Uint8Array(32);
globalThis.crypto.getRandomValues(tokenArray);
const confirmationToken = Array.from(tokenArray, byte =>
  byte.toString(16).padStart(2, '0')
).join('');

// Store with 24-hour expiry
await kv.put(`token:${confirmationToken}`, email, {
  expirationTtl: 86400,
});
Smart Result Page
Instead of multiple pages for different states, I built one dynamic result page that handles all newsletter status messages. It reads URL parameters and updates content client-side:
const messages = {
  confirmed: {
    title: 'Subscription Confirmed! 🎉',
    isSuccess: true,
  },
  'token-expired': {
    title: 'Link Expired ⏰',
    isSuccess: false,
  },
  // ... other states
};
The page shows appropriate actions based on the message type - “Check Gmail” for pending confirmations, “Read Latest Posts” for successful actions.
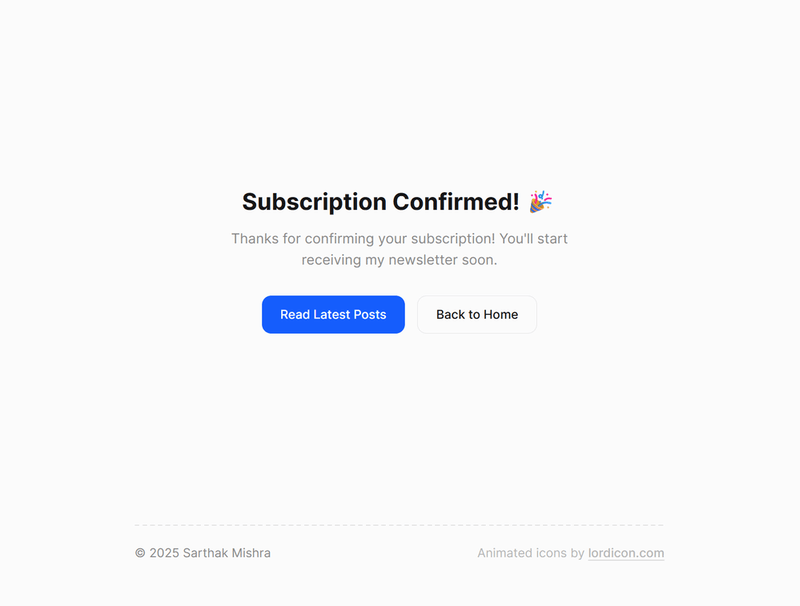
Result page - subscription confirmed
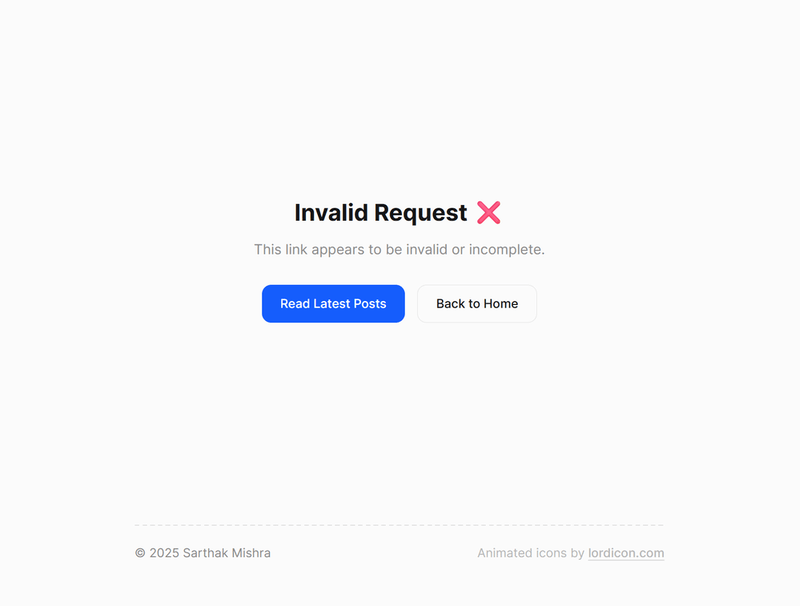
Result page - invalid request
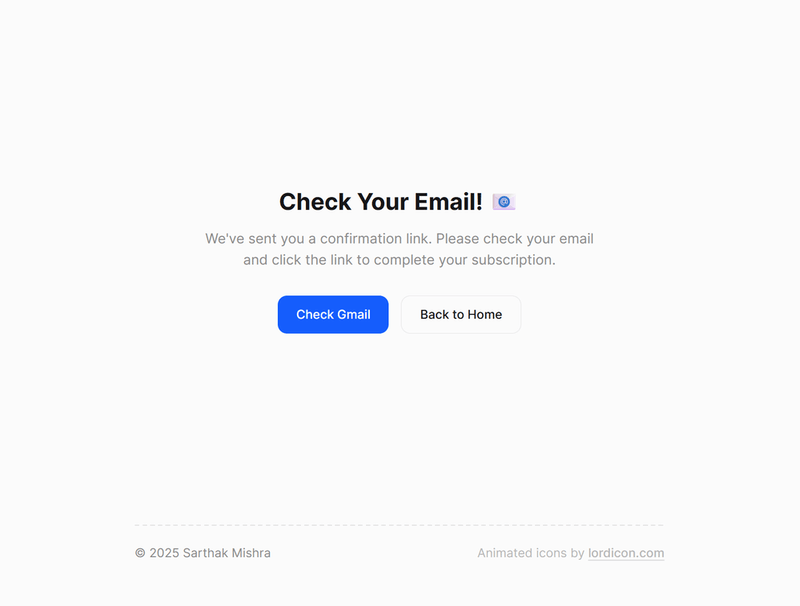
Result page - check email
MDX-Based Newsletter Management
The real magic happens in the content system. Each newsletter is a simple MDX file with frontmatter:
---
title: 'Weekly Roundup'
issueNumber: 7
date: '2025-01-14'
recipientName: 'friend'
draft: false
blogPosts:
  - title: 'Self-hosting done right'
    url: '/blog/self-hosting-ansible-docker'
    image: '/posts/self-hosting.png'
---

Happy Tuesday! This week I've been deep in infrastructure automation...
Astro’s content collections handle the schema validation and static page generation. Each newsletter becomes a proper webpage at /newsletter/issue-1 for SEO.
Automated Scheduling
The scheduling script was the final piece - a comprehensive automation system that runs locally as part of deployment. It connects to Cloudflare KV via REST API, scans for new newsletter issues, and orchestrates the entire scheduling process.
The Script Architecture
The scheduler is built around several key components:
1. Local KV Integration: Instead of requiring server deployment to access KV, I built a REST API client that connects directly to Cloudflare’s KV API from my local environment:
class LocalKVStore implements KVNamespace {
  private baseUrl: string;

  constructor(accountId: string, namespaceId: string, apiToken: string) {
    this.baseUrl = `https://api.cloudflare.com/client/v4/accounts/${accountId}/storage/kv/namespaces/${namespaceId}`;
  }

  async get(key: string): Promise<string | null> {
    const response = await fetch(`${this.baseUrl}/values/${key}`, {
      headers: { Authorization: `Bearer ${this.apiToken}` },
    });
    return response.status === 404 ? null : await response.text();
  }
}
2. MDX File Parsing: The script scans src/data/newsletter/ for MDX files, parses frontmatter, and finds the latest non-draft issue:
function getLatestNewsletterIssue(): ParsedNewsletter | null {
  const files = fs
    .readdirSync(newsletterDir)
    .filter(file => file.endsWith('.mdx') && file.startsWith('issue-'))
    .sort();

  // Skip drafts and find highest issue number
  for (const file of files) {
    const { frontmatter } = parseFrontmatter(content);
    if (frontmatter.draft === true) continue;
    // Return latest by issue number
  }
}
3. Smart Scheduling Logic: Calculates the next Thursday at 10am PDT, accounting for timezone conversion and edge cases. Note that this implementation is simplified for this article; a more robust solution would use a library like date-fns-tz to handle daylight saving changes automatically.
function getNextThursdayPDT(): Date {
  const nowPDT = new Date(
    new Date().toLocaleString('en-US', {
      timeZone: 'America/Los_Angeles',
    })
  );

  const currentDay = nowPDT.getDay();
  const currentHour = nowPDT.getHours();

  let daysUntilThursday: number;
  if (currentDay < 4) {
    daysUntilThursday = 4 - currentDay;
  } else if (currentDay === 4 && currentHour < 10) {
    daysUntilThursday = 0; // Today, but before 10am
  } else {
    daysUntilThursday = 7 - currentDay + 4; // Next week
  }

  // Convert back to UTC for Resend
  return new Date(nextThursday.getTime() + 7 * 60 * 60 * 1000);
}
Individual Email Scheduling
One of Resend’s limitations is that batch emails cannot be scheduled - only individual emails can use the scheduledAt parameter. The script handles this by creating individual scheduling requests:
const emailPromises = subscribers.map(async email => {
  const unsubscribeUrl = await getUnsubscribeUrl(email, kv, baseUrl);

  return await resend.emails.send({
    from: 'Sarthak Mishra <updates@mail.sarthakmishra.com>',
    to: [email],
    subject: `${newsletter.title} #${newsletter.issueNumber.toString().padStart(3, '0')}`,
    scheduledAt: scheduledDate.toISOString(),
    headers: {
      'List-Unsubscribe': `<${unsubscribeUrl}>`,
      'List-Unsubscribe-Post': 'List-Unsubscribe=One-Click',
      'X-Entity-Ref-ID': `newsletter-${newsletter.issueNumber}-${Date.now()}`,
    },
    react: Newsletter({
      /* ... */
    }),
  });
});

await Promise.all(emailPromises);
Duplicate Prevention & Status Tracking
The script maintains comprehensive state in KV to prevent duplicate sends:
// Check status before scheduling
const status = await checkNewsletterStatus(issueNumber, kv);
if (status.sent || status.scheduled) {
  console.log('Newsletter already processed');
  return;
}

// Mark as scheduled after successful scheduling
await kv.put(
  `newsletter:scheduled:${issueNumber}`,
  JSON.stringify({
    scheduledAt: new Date().toISOString(),
    scheduledFor: scheduledDate.toISOString(),
  })
);
Deployment Integration
The script runs as part of my deployment pipeline. After pushing a new newsletter MDX file, the deployment process automatically:
- Builds the site with the new newsletter archive page
- Runs the scheduling script to check for new issues
- Schedules emails if a new non-draft issue is found
- Deploys everything to Cloudflare Pages
This means I can write a newsletter in MDX, commit it, and the entire scheduling happens automatically. The script validates everything: Resend’s 30-day scheduling limit, subscriber status, duplicate prevention, and proper unsubscribe token generation.
The Result
I now have a newsletter system that:
- Costs $0 (Cloudflare Workers & KV + Resend - Free tiers)
- Handles subscription, confirmation, and unsubscribe flows automatically
- Creates SEO-friendly archive pages for each issue
- Schedules newsletters automatically on deployment
Writing a newsletter feels exactly like writing a blog post. I can focus on content instead of fighting with tools.
P.S. This is my first newsletter.